Monday, September 27, 2010

Garage Slab and Other Concrete Adventures

Finished Garage Slab


Last Tuesday, we managed to pull together the pour for our garage, and two smaller landings and steps inside the house. We spent the week before excavating more dirt, replacing it with gravel, building forms, laying welded wire and rebar, placing dough-bies (?), and so on. In all, the day was really three small pour projects: a landing and stair between the garage and mudroom, a landing and stair between the hall and our bedroom, the battery storage box for our off-grid power system, plus the garage floor itself.

Prepped and Ready

The garage floor is such a relief to have done. This partly has to do with how the cats had decided the dirt/sand/gravel that was there before was an ideal litter box (pee-yew!). But also, now we can actually organize and store things in the space, knowing that we don't have to move everything out at some future date.

Greg Smith was our finisher, and we also had Mikey on hand to do some finishing, along with Karl, Aaron, myself, and Drew, to supervise and look on, with his broken collarbone not allowing him to work.

All in all, most things went smoothly on Tuesday. There were a few hiccups, as there always are on a pour day. But really nothing major. I'm happy with the results. I was telling Greg Smith, our concrete finisher, how great concrete projects are because by nature, you can't leave work till later. It's a lot to get it ready, but once you pour and finish, it's D.O.N.E. Then you get to sit back and enjoy the results.

The Landing into our bedroom


Filling Up the Landing into the Mudroom from the Garage


One quarter there in the garage


Finishing the Garage Slab


Finished Landing Inside the Mudroom


The Finished Landing into Our Bedroom

Sunday, September 26, 2010

All Mattole Foods Potluck 2010

Winner for Best Vegetable Dish: Lindsay's Carrot, Onion, Potato Cakes with Sliced Tomatoes and Yogurt Cheese

My Summer Veggie Quiche


Winner for Best Beverage: Ian's Yellow Jacket Apple and Cherry Juice


Winner for Best Dessert: Jim and Kristen's Lemon Blueberry Ice Cream

Winner for Best Meat Dish: Duck Dumpling Stew by Todd and Jessica


Winner for Best Overall: Ryan's Pumpkin Stew with Yogurt Chive Sauce


Each year the Mattole Self-Sufficiency Project puts on an all Mattole food potluck. Anyone can enter a dish, but all the ingredients of the dish must be raised in the Mattole watershed.

For this year's entry, I made a Garden Veggie Quiche. I grew some wheat two years ago, and ground the flour with our hand-powered mill. I made butter and ricotta cheese with milk I got from our friends' milk cow. I mixed up that butter and flour with a little milk and rolled out a crust, and then filled it with an onion, garlic, basil, egg, ricotta, corn, zucchini, and pepper filling. It was delicious.

The potluck featured a lot of lovely dishes, many of which were more complex this year due to the addition and availability of cow dairy. There were soups, stews, salads, veggie dishes, dried fruit, fruit leather, ice cream, grasshoppers, juice, alcohol, applesauce, and more.

The dishes were judged on a combination of flavor, complexity, difficulty of procuring the ingredients, and it seems there was a bonus for using other people's ingredients, as this represents community food sustainability. The winners were:
  • Best Veggie Dish: Lindsay's Carrot-Potato-Onion pancakes, served with sliced tomatoes and yogurt cheese
  • Best Meat Dish: Todd and Jessica's Duck Dumpling Stew
  • Best Dessert: Kristen and Jim's Blueberry Ice Cream
  • Best Side Dish: Mimi and Harold's Dried Fruit Collection. The presentation of this particular dish was stunning.
  • Best Overall: Ryan's Pumpkin Stew, served with yogurt chive sauce
All admission prices were paid in Petols, our local currency, which is based on the value of silver, and prizes were awarded in Petols.

I think that the next kind of food category to conquer is vegetable oil, such as sunflower, rape, olive, etc. That's mostly what's missing!

Saturday, September 25, 2010

Sunflower Seeds and Dill Seeds


Home-Grown Sunflower Seeds


A Collage of Sunflower Heads


Ella Harvests Dill Seeds


I've clearly been dismal at posting to my blog for several months now, but I hope to entice you all back into the readers' fold with posting a little more often...there is so much going on at the homestead lately. Aside from Drew breaking his collarbone two weeks ago, putting him out of work for a minimum of 8 weeks, we've been back to working on the house more intensively. We are nearly finished with our bedroom walls, and we poured our garage slab last week. Karl is back on the job for two months, and we're trying to push to get into our kitchen.

Amid doing the basic homestead chores for two people and working full-time on the house, I'm still nurturing our garden along. After a looooooong wait for many of our warm-weather, summer crops, they are at last filling out, plumping up, and reaching harvestable size. All except the tomatoes. Tomatoes are the garden crop that keeps me going, that motivates me in the winter when I start seeds. So it's been a little disappointing that they are just now coming barely, and slowly ripe. We have been eating a lot of sweet corn, zuchinni, green beans, cucumbers, and a few cherry tomatoes, a little basil, and so on. The winter squash harvest looks to be a bumper, and today, I prepared beds for all our winter crops: broccoli, brussels sprouts, cabbage, and kale. The carrots and beets are already almost ready. I'm hoping we won't miss the window this year due to gophers or bad weather.

Today, I harvested our beautiful sunflower heads, which were drooping and heavy with the weight of seeds. Once I looked closely, I understood why, as each ten-inch disk was packed with black and white seeds swirling into the center of a fibonacci spiral. I clipped each head below some leaf branches, and wiped off the remaining flower tops to reveal the seeds underneath. Ella helped me carry them to the shed porch, where I hung them up to dry with some twine indoors, to protect them from birds and mice. But not before I sampled some raw, fresh seeds, which before they acquire the gray color you see in the store-bought variety, are pure white and very flavorful. What a rich food we can grow so easily.

Later in the afternoon, as I was preparing the winter beds, I pulled out the workhorse dill plant I had this summer. It was a volunteer that germinated very early in the spring. I carefully left it and weeded around it all spring and summer, and had a fresh supply of dill at all the right times as I made jars of cucumber and dilly bean pickles. Usually, when I plant dill, it's ready too early for the other supplies. The dried plant, before I pulled it up today, was almost as tall as me. (Don't worry, I still have another that is still making dill heads enough for canning and salads!)

Tonight after dinner, Ella and I carefully removed all the dried seeds from the heads, to save for gifts, for making sauerkraut, flavoring pickles, and to plant again next year. A full cycle of locally-grown seed is a good feeling indeed.

Tuesday, August 17, 2010

Bathroom Plaster


It's been a while since I've posted, summer's schedule is unpredictable and inconsistent, but we are getting back to house work after Drew spent the last 6 weeks building instream rock and log structures in the Mattole estuary for the Mattole Salmon Group. I'd like to make a post about that soon...

But here is the lovely bathroom. This is still first coat of plaster, but it looks like a room now. The shower has the hardibacker in it and we are preparing that for tile. I'm loving the rich colors of the clay plaster, especially when the light pours through the windows in the late afternoon.

Yesterday, Drew and Aaron put the second coat of Structolite on the west bedroom wall. It was the last wall we needed to basecoat. Now we're ready to put clay on that wall, and then we can finish coat all the walls. I'd like to try and organize a work party, to get it all done in one day. Now that would be something. If you live close by, come by and look, and if not, enjoy these little photos....

Tuesday, June 29, 2010

Finish Plaster!

From This....


And This.....


To THIS


On the left is the wall that's been done, on the right, a wall with basecoat Structo-lite (Gypsum plaster)


I've been hard at work for six days straight, while Ella has been at day camp. I knew that I wouldn't finish the job, but that I could definitely move the bedroom project a lot farther forward. And how!

Last Wednesday, the first day of camp, I still had some sanding to do as prep, and even some mudding to do, to fill in some gaps in the wall. Thursday, I primed drywall mud with a transitional primer, to prevent variance in color with the final coats of plaster. Friday, I used the "sanded primer", which is basically glue and sand, and it goes on under the clay, so that it will stick, especially to a drywall surface. Also on Friday, Drew and I put the second base-coat of Structo-lite on the south wall.

Saturday was a nice day off, celebrating Adam and Unity's wedding. Blessings to them and their family! We went swimming too, and followed it with a lot of merriment at our wedding site, eating dinner, and dancing the night away to Absynth Quintet.

Sunday was back to it, with more drywall priming, and we mixed up our first batch of clay. It needs to stand a little while, so I mixed it for work the following day. And yesterday, Monday! I got to smear that lovely, smooth, buttery plaster on the east wall of our bedroom. It is a pleasure to work with. The color when it's wet is like chocolate milk, and when dry, it's a light light neutral brown. It's called Nantucket Sand. Today, I put on the first coat on the south wall, and after I finish my lunch here, I'm going to continue around the hallway. It looks awesome!

The clay does require a second coat, but I'm not concerned. The work is fun and easy, and SOOO satisfying. Once we finish this step, it's on to sanding/cleaning the floor and staining it, and then wood trim, and then our bedroom is DONE. I said DONE, as in, we can move our bed into it! Yippee!!! (Can you tell I'm excited?

Thursday, June 24, 2010


Windowsills of 2x12 recycled redwood


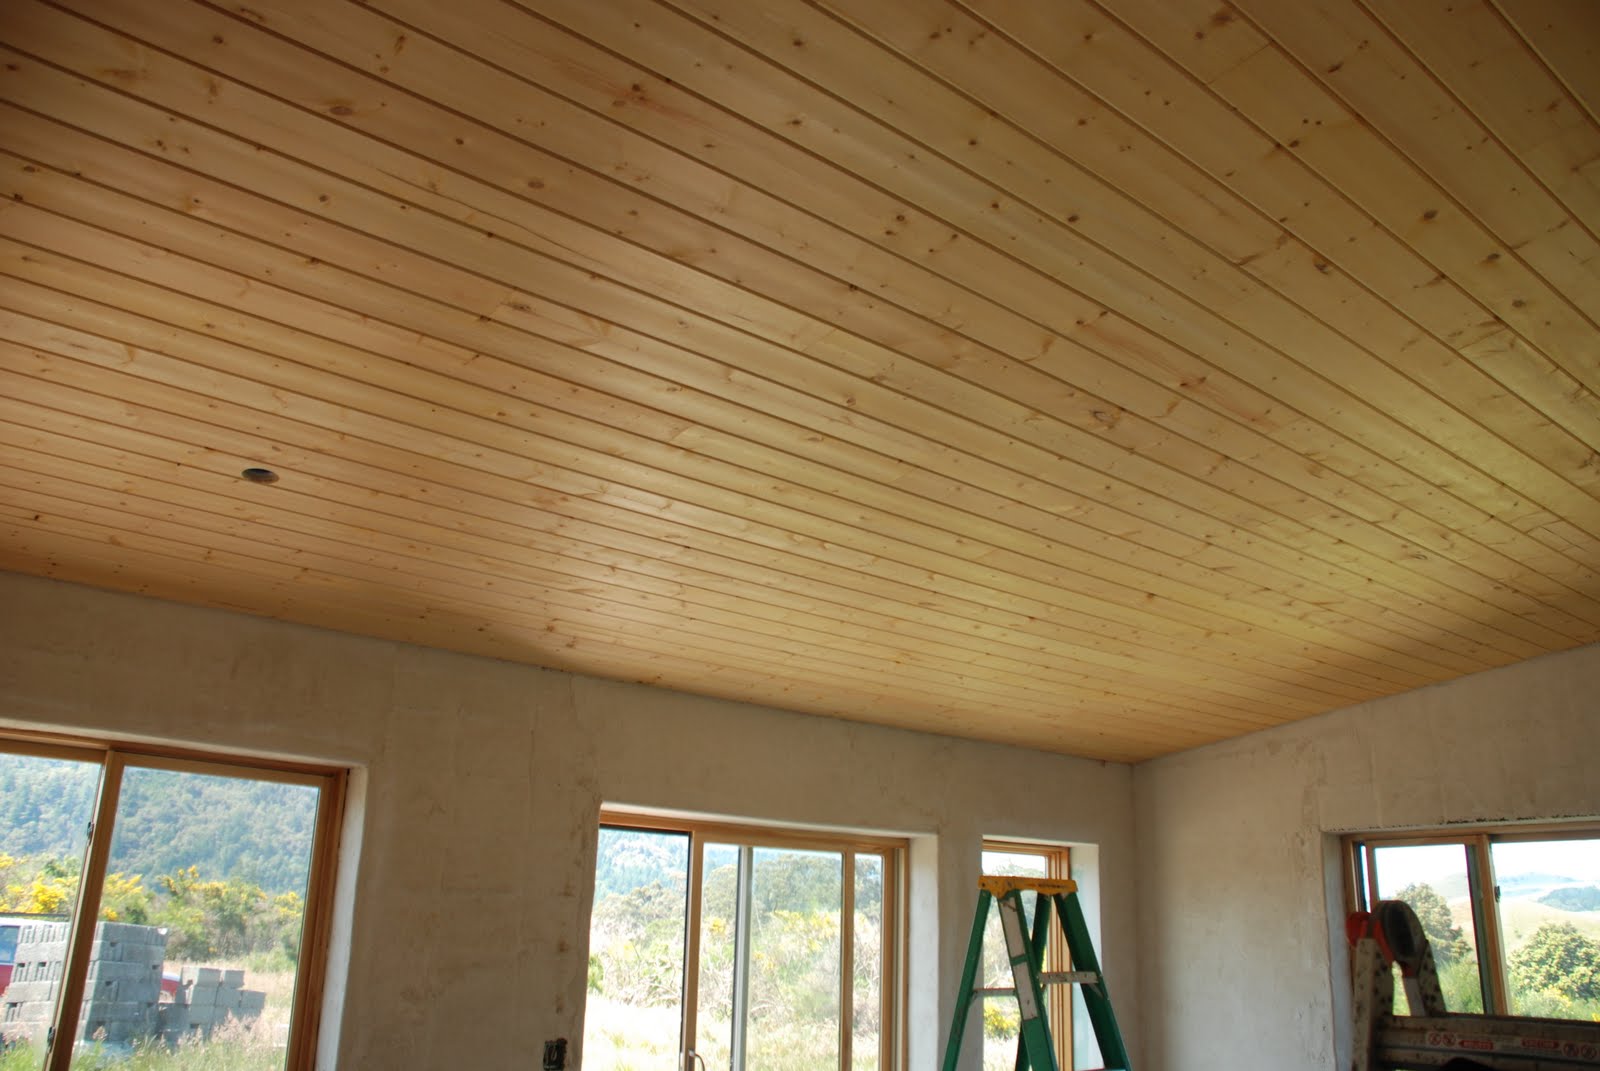
Ceiling wood finished, love it. Stained Fir/Pine/Spruce


We're getting somewhere. Slowly. These things, as we've discovered, take time. Lots of it. I've lately taken to quoting Sarah McLachlan, with her album title, "Fumbling Toward Ecstacy". Yeah. So we've finished the ceiling in our future bedroom. And we've finished three of four windowsills. Sexy oiled redwood next to oiled pine. I love how it looks. And now we're ready for plaster on several walls, and all the materials are on hand, and Ella is a day camp all week. So I'm hoping to have more photos to post soon, showing our plaster progress, too.

We stained the ceiling wood with an EcoProcote product called TimberSoy, a totally no-VOC wood stain. It's pretty nice to work with stain materials that you don't need gloves, good ventilation, or skin protection to install, and then can clean up with soap and water. Go eco-groovy.

Also, here's a shot of our wall plaster in it's packaging: cloth bags. Love it. Can't argue with that. Compostable. Or reuseable.

Wednesday, June 2, 2010

Bee Swarm


Last weekend, I was walking past the west side of our house with Ella, when I heard a curious sound...which I will illustrate with a quote from Winnie the Pooh:

"Winnie-the-Pooh sat down at the foot of the tree, put his head between his paws and began to think. First of all he said to himself: "That buzzing-noise means something. You don't get a buzzing-noise like that, just buzzing and buzzing, without its meaning something. If there's a buzzing noise, somebody's making a buzzing-noise, and the only reason for making a buzzing-noise that I know of is because you're a bee." From Pooh's Bedtime Book by A.A. Milne.

And when I adjusted my gaze upwards, I saw a whole pile of bees clumped on the rafter of the house. Two clumps, actually.

When one is not prepared to have bees of their own, as we are not at the moment, a person in my shoes needs to call Ben, who is very enthusiastic about his bee project right now. He said he'd come over shortly and try to catch the swarm, because he wanted to replace a hive that died over the winter. But by the time he got here, the swarm clump had shrunk, suggesting that they had already chosen our house as their post-swarm location. Which is what we confirmed. They had moved into a chance cavity at the edge of our roof. Darn.

So now we're not sure what to do. We're going to try to vacuum them out with a shop-vac. Short of that, we may need to close them up and allow them to die, as we can't have bees living in the roof. Just our latest homestead adventure...

Sunday, May 23, 2010

Spring Cleansing


Our Raw Meal, Before Doing Only Juice: Sprouted Sunflower and Grain Crackers, Carrot-Beet-Sunflower Seed Pate, Green Salad with Sprouts, and Lacto-Fermented Sauerkraut

During this last week, Drew, our housemate Andrea, and I endeavored to clean out our bodies a little by doing a juice f(e)ast. Though all three of us eat very healthy food, and have pretty healthy lifestyles, we felt a clean out would be a good idea. Many natural health practitioners recommend an annual cleanse, particularly in the spring.

The cleanse entailed descending slowly toward the fast: one day of whole foods, followed by a day of eating only raw foods, followed by three days of only vegetable juice. At the end of the third juice day, we did a liver and gallbladder flush. Then, on the way out of the cleanse, we ate mostly raw for a day, then back to whole foods. I can verifiably say that I got clean.

It's a funny experience to consciously alter the intake of food, and even to stop eating for a time. It was a very psychological process, one that we all learned a tremendous amount from, about our bodies, about our relationship with food, and about our regular habits. It was a pretty intense cleanse, and we all found that non-essential activities had to be put to the side. It was almost like a vacation. I would recommend it, for those so inclined.

To make the juice, as well as some of the raw foods, we used our prized Green Star Juicer. Each day, we consumed about a half gallon of raw vegetable juice each, which included an entire bunch of greens, a cucumber, carrots, beets, celery, and apples. After letting go of my attachment to chewing food, this juice is surprisingly nourishing. I learned about the healing power of raw veggie juice from the Juice Feasting website. Before my friend showed me this site, I couldn't have conceived of only eating juice, even for one day. But the basic concept, as with all types of fasting or cleansing, is to lighten the load on our digestive organs, so that they can work on eliminating their backlog of wastes and toxins. I can say, after going through this process that it really and truly does work. I am inspired by my body's ability to clean itself with a little help from my choices on the outside.

There are a lot of great resources on the internet describing cleansing. If you are interested in cleansing, do some research, or consult a natural health care practitioner.

Sunday, May 9, 2010

Living Foods


My Lacto-Fermented Sauerkraut...Mmmmmm

Last year, I was having a health issue, and one of the things I did to improve it was to delve into the world of raw and living foods. We sprout our breakfast cereal grains (spelt, kamut, rye, and wehani rice), we got into sprouting mung beans, lentils, and alfalfa. And we got into raw juice, especially the juice of greens like kale, collard greens, and bok choi, mixed with healthy doses of carrots, beets, celery, and apples for sweetness. (For a great website on juicing, check out Juice Feasting. I haven't ever done it, but may some day).

Around that time, I got turned onto a cookbook called Nourishing Traditions, by Sally Fallon. Sally is a champion of living foods, whole foods, and something that I learned a lot about from her book was about the benefits of truly cultured and raw dairy products. I'm not talking about Yoplait yogurt, filled with sugar (or maybe corn syrup?), and flavorings and thickeners, I'm talking about kefir, homemade yogurt, homemade cheese, and whey. I've kind of programmed myself against dairy products as mucous-producing foods best left to infrequent use. Our family meals use dairy as more of a condiment than a main ingredient.

But now we are trying some experiments, as our neighbors are milking a goat. Besides having fresh, raw goat milk to give our daughter when she wants milk, I tried making some kefir last week, and some goat ricotta. The kefir was super easy. If I had real kefir grains, it would have been even easier. I used some commercial culture that comes in a little packet. You heat the milk to 180 degrees, let it cool, and stir in the culture. Then, leave out at room temp for approximately 24 hours, and you have kefir. Kind of like liquid yogurt. SO good with a little maple syrup to sweeten, or in pancakes. I also made goat ricotta, by pitching lemon juice into 180 degree goat milk, and straining the curds through cheesecloth. I added salt and garlic into the cheese, and enjoyed it on crackers. Yummmm.

Making cheese leaves whey behind, and I have been dying to try making sauerkraut with whey, which I have heard makes amazing kraut. I used the recipe from this website. It's supposed to be ready tomorrow, and I can't wait to try it.

And finally, we've been given a kombucha scoby, and I've got our first batch of kombucha fermenting on the counter. I am really excited about this, because even though I love the product, it kind of feels like those kombucha companies are gouging us, given that it's made with plain old black tea and white sugar, and a reproducing culture. It's not like it costs anywhere NEAR $4 per jar to produce. So I'm happy to make my own at home.

Looking forward to sharing the fruits of these labors when I get to try them...hmmm, what do I tag this post with? Maybe wildcrafting, as these foods are about nourishing wild little critters?

Friday, May 7, 2010

Here Comes Plaster


Our first test area, in the Master Bedroom


Same wall, Done with first basecoat


Other wall, almost done, with basecoat

I couldn't help myself any longer...we've been inching toward plaster-type tasks these last few weeks, and I just had to get my trowel dirty, and dive in. So on Tuesday, we mixed up our first batch of Structolite and sand plaster and applied it to our Faswall block walls. We were pleasantly surprised at how easy the material is to mix and trowel. However, we quickly realized that we're going to need to do at least two coats of this basecoat plaster before the walls are ready for the American Clay. The Faswall blocks have a good bit of variation between rows and courses, leaving some blocks slightly proud, and some slightly sunken. Additionally, sometimes there are some gaps between blocks, and also at corners that need to get filled. So we'll have to see how the second coat goes on. Hopefully, we'll be able to do mostly level it with the second coat of plaster.

Even though we realized there is a second coat needed, we are thrilled with the transformation of the Faswall wall! It looks so nice! And light! And finished! I am loving it! Plastering is addictive. I hope I continue to enjoy it so much as we continue on with it...